
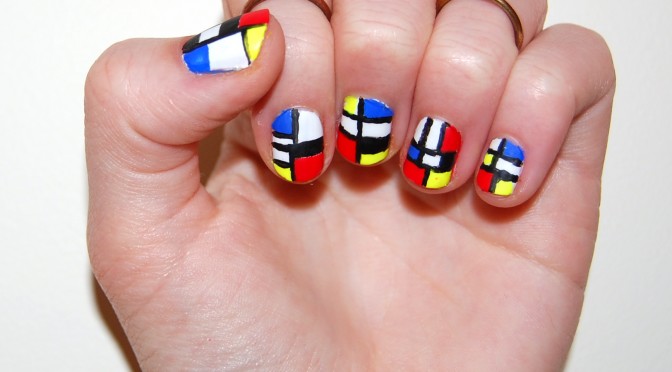
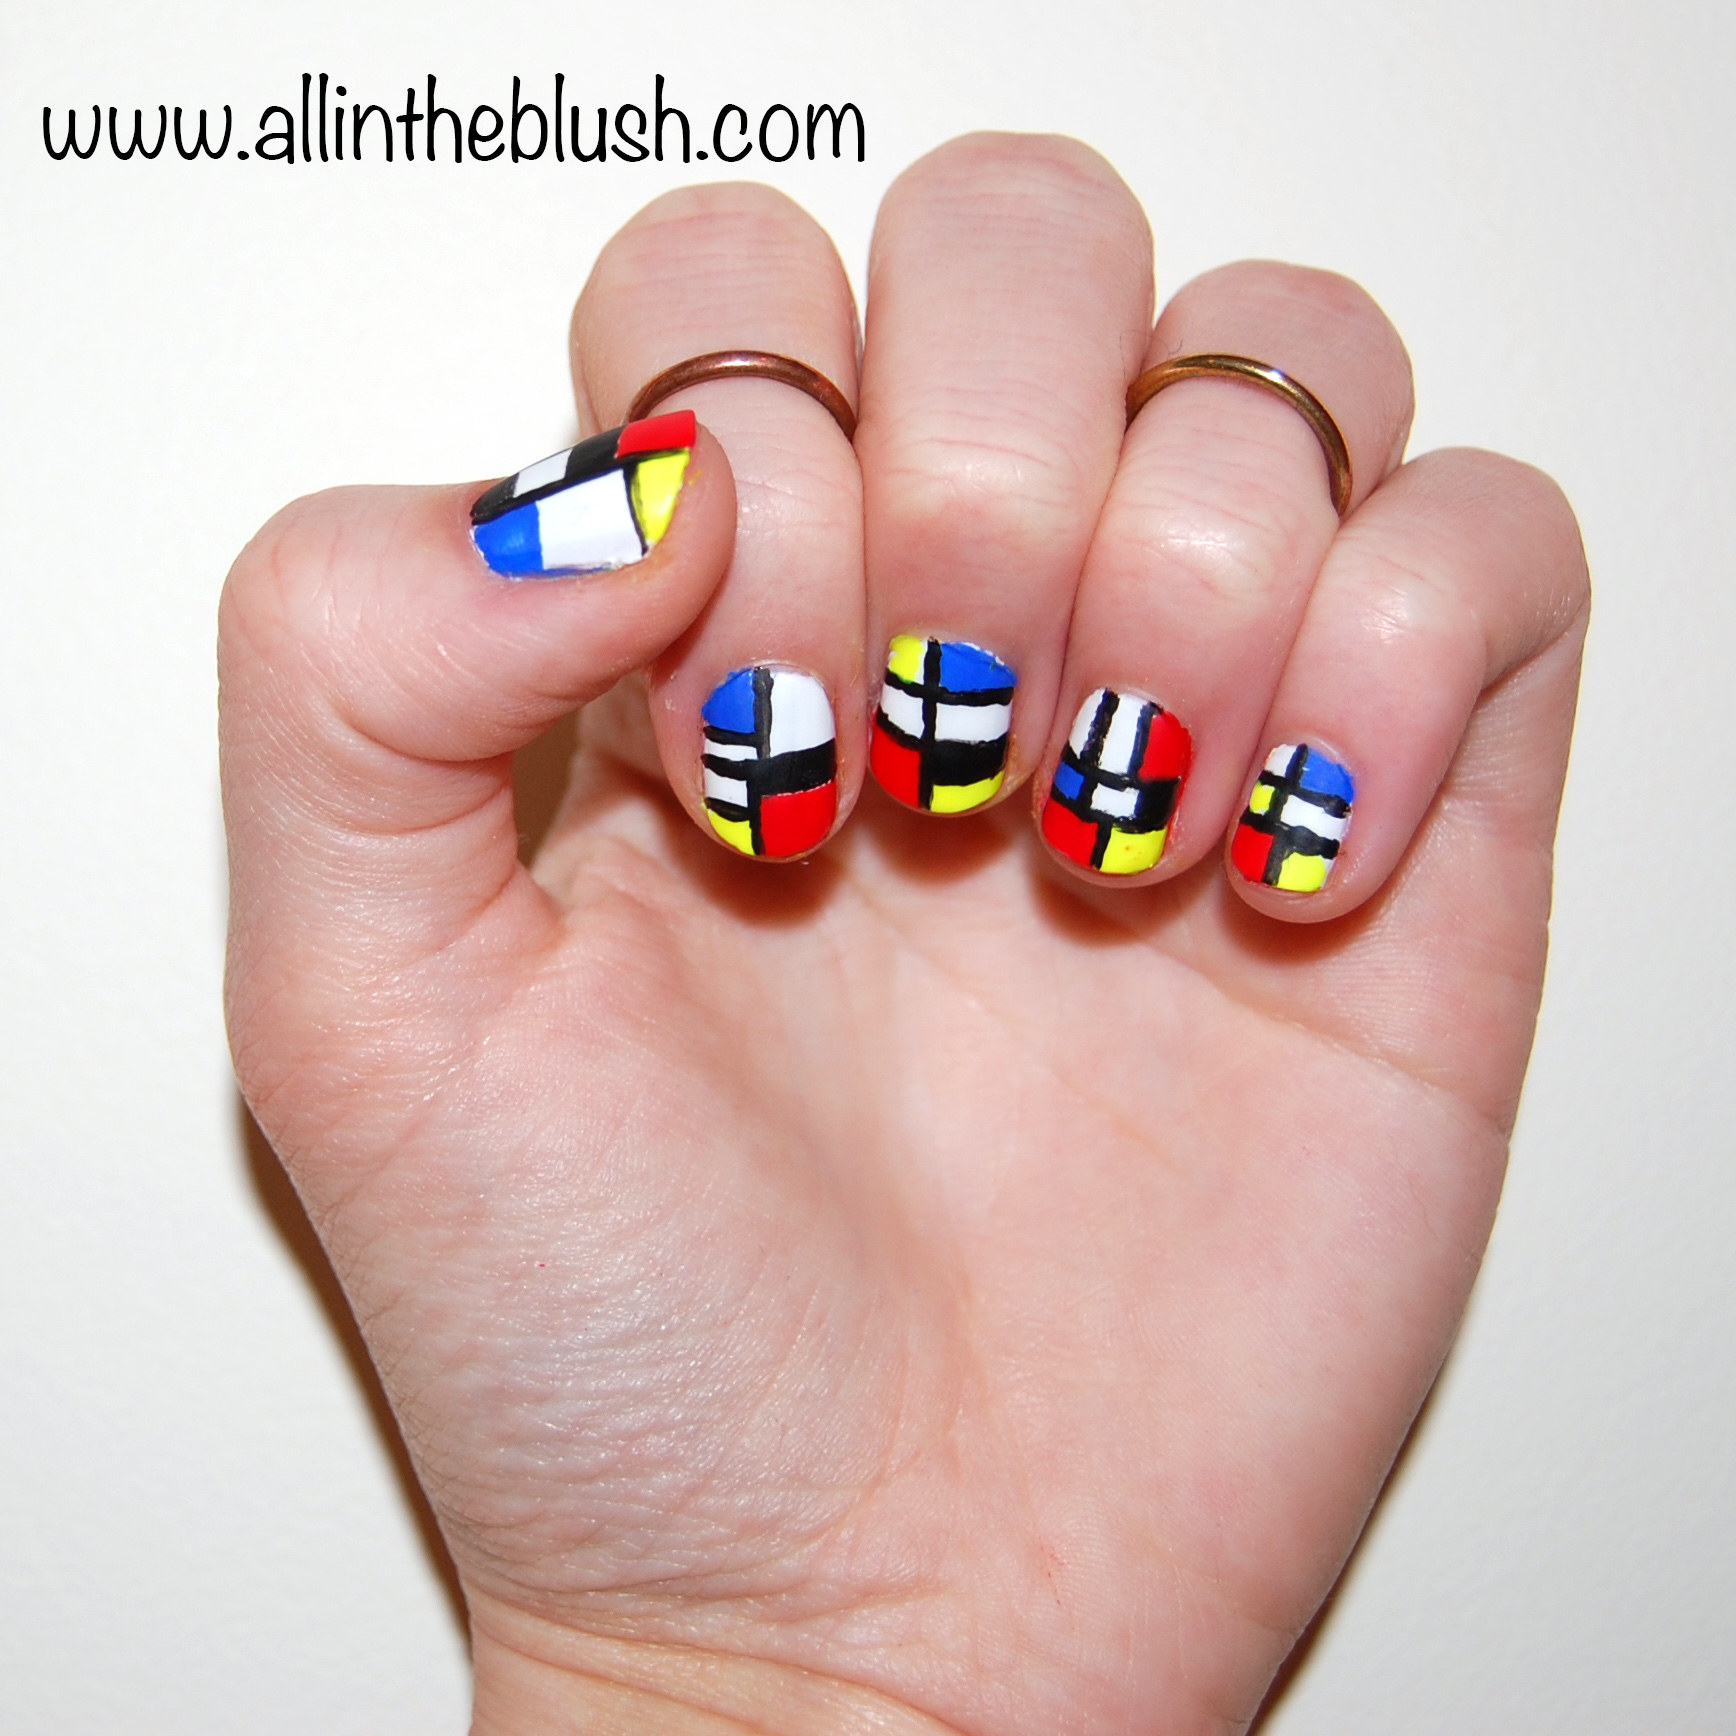
Hello my lovely readers! I’m sure many of you have seen the famous red, blue, and yellow “compositions” by Piet Mondrian. This iconic and recognizable pattern makes for a perfect nail design that actually isn’t too tricky to achieve! I’ve created an easy step by step guide to getting “Mondrian” nails and also included some links to other bloggers with famous art inspired nails!
What you’ll need:
- Nail Art Brushes (See here)
- Nail Polish (Black, White, Red, Blue, Yellow)
- Scotch Tape
- Top Coat (optional)
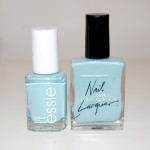
Polishes I used:
- Essie Blanc
- Essie Butler Please
- Essie Hip Anema
- Essie Licorice
- American Apparel Neon Yellow
- Chanel Top Coat Velvet
Buy at ULTA
Buy at MACYS
Buy at ULTA
Buy at ULTA
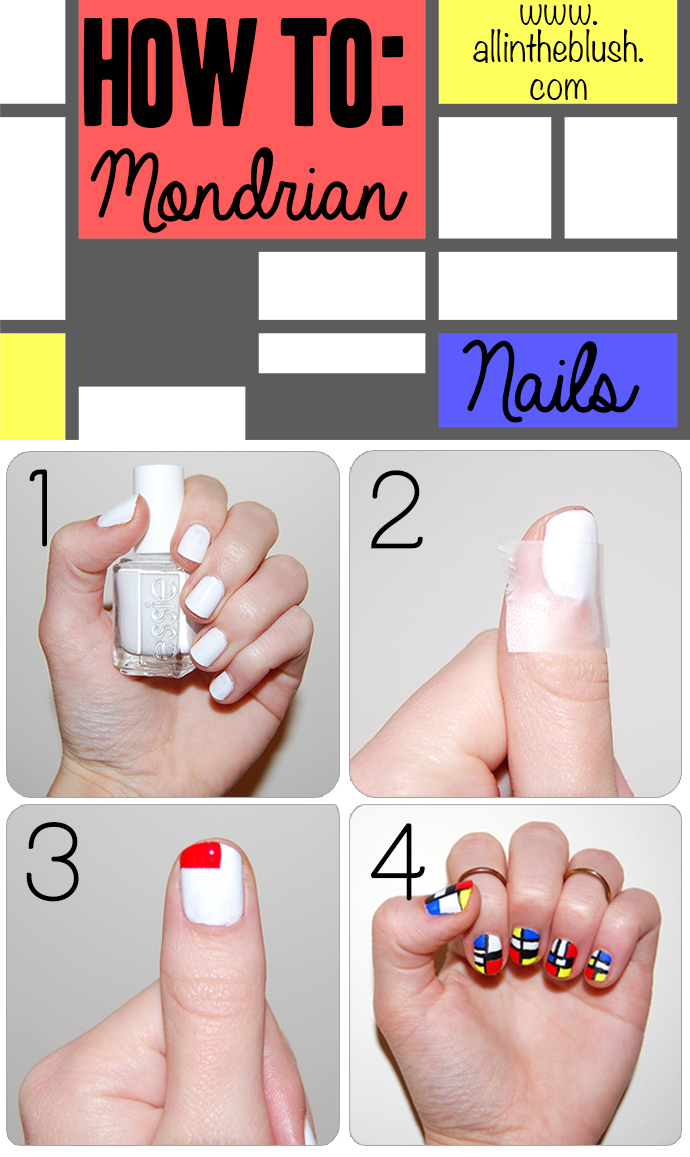
Step by step guide:
- Begin by painting your nails all white. I chose Essie’s Blanc. Let it dry completely.
- Next, place the scotch tape over your nail to create a stencil, and paint the uncovered area the color of your choice.
- Repeat step 2 all around your nail to create different color square like shapes as shown above.
- Use the nail art brushes to create black lines around the color blocks.
- Let it dry and then apply a top coat. I chose Chanel’s matte top coat.
Voila! Piet would be proud.
Here are some links to other artwork inspired nails:
Do you ever incorporate art on your nails? If so, what artwork? Let me know in the comments below! 🙂


aaah the patience of Job!
These look fantastic! I’ll definitely give them a try!